Introduction
Understanding the sequence of a bathroom remodel turns a complex project into a manageable journey. In Huntington Beach, coastal conditions, local permitting, and space considerations shape how professionals plan, build, and finish your new bath. This step-by-step guide explains what happens from the first conversation to the final walkthrough so you can anticipate decisions, align schedules, and keep momentum. For a broader perspective on bathroom remodeling, we also highlight quality checkpoints that protect your home and ensure a smooth experience.
With clarity on roles, milestones, and quality standards, you can enjoy the process as much as the finished space.
Phase 1: Discovery and Goals
Every project begins with understanding how you live and what you want to change. Define what is working and what is not—storage, lighting, ventilation, or layout flow.
- List goals such as brighter light, more counter space, or a curbless shower.
- Collect inspiration images and note the elements you like in each.
- Measure the room and document windows, doors, and existing utilities.
A clear brief focuses design and eliminates guesswork later.
Phase 2: Concept and Planning
Designers translate your goals into workable layouts and finish palettes. Early planning ensures that every selection has a place and purpose.
- Layout studies for vanity, shower, tub, and toilet arrangements.
- Finish direction for tile, counters, cabinetry, and hardware.
- Lighting layers with attention to mirror illumination and dimming.
- Ventilation planning for quiet, effective moisture control.
Preliminary schedules set milestones for selections and procurement.
Phase 3: Documentation and Permitting
Detailed drawings and specifications support accurate pricing and city approvals when required.
- Create plans, elevations, and details.
- Coordinate plumbing and electrical notes for inspectors.
- Prepare permit applications and submit to Huntington Beach as needed.
- Anticipate inspection points and plan access.
Thorough documentation shortens review cycles and clarifies expectations for the field team.
Phase 4: Procurement and Logistics
Ordering materials at the right time prevents schedule gaps. Special-order items, glass, and stone require lead time.
- Confirm selections and quantities with contingency for waste.
- Schedule delivery windows aligned with installation phases.
- Plan safe storage and staging to protect finishes.
Material readiness keeps trades moving without idle days.
Phase 5: Site Protection and Demolition
Before any removal begins, the team protects floors, walls, and adjacent rooms. Dust containment, air scrubbing, and daily housekeeping maintain livability, especially when you remain at home during the remodel.
Demolition is methodical: fixtures, tile, and cabinetry are removed in a sequence that preserves structure and utilities for safe reconnection.
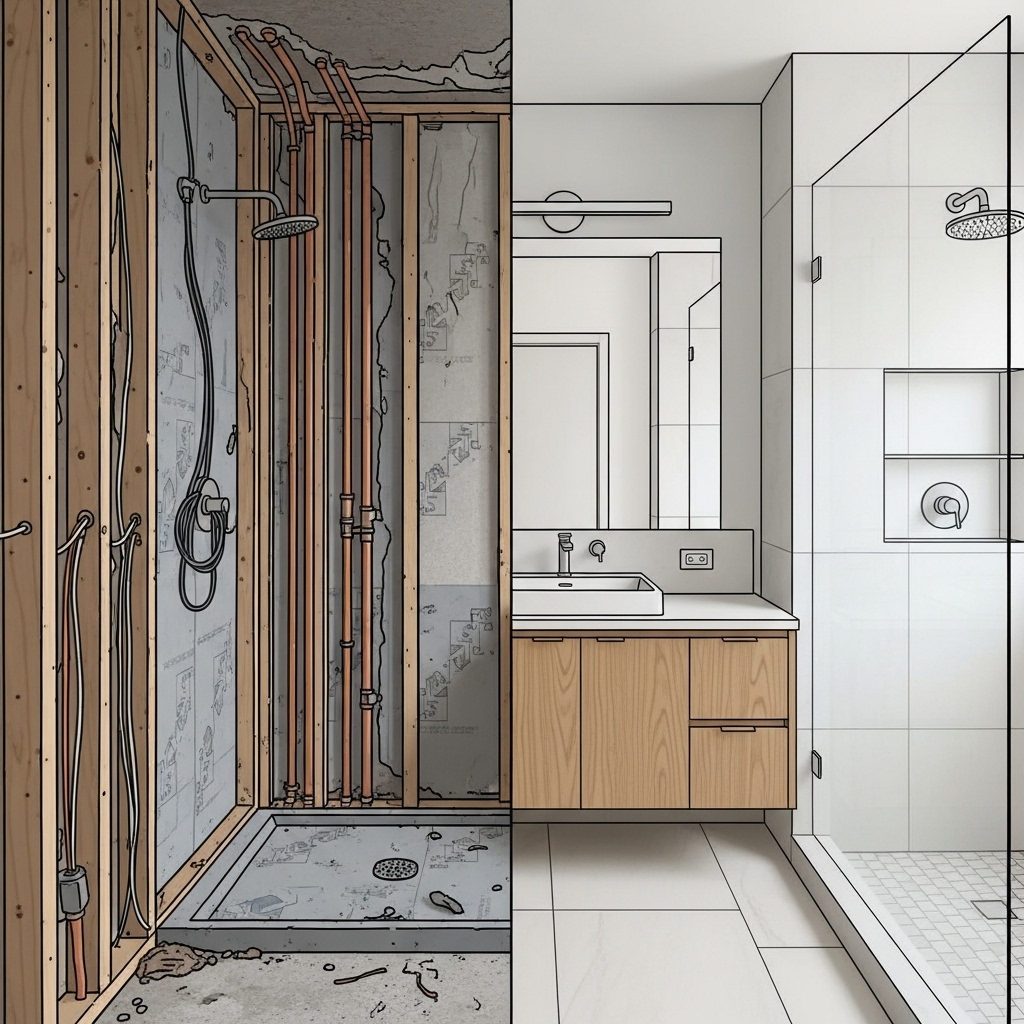
Phase 6: Rough Plumbing, Electrical, and Framing
Behind-the-scenes infrastructure supports reliability and comfort. Plumbers set drains and supplies, electricians place circuits and controls, and carpenters adjust framing for niches, benches, or new openings. Proper exhaust fan routing to the exterior is vital in coastal air.
Phase 7: Inspections and Close-in
Rough inspections verify safety and compliance. Once approved, insulation and backer boards go in, and waterproofing begins. Continuous membranes, slope-verified pans, and sealed penetrations form the moisture defense that protects your home.
Phase 8: Tile, Stone, and Surfaces
With substrates prepared, tile layout and installation set the room’s tone. High-quality work shows in straight lines, aligned joints, and clean transitions. Slab fabrication for counters or shower walls requires precise templating and careful handling.
- Dry layouts confirm pattern and cut lines.
- Movement joints accommodate expansion and contraction.
- Protective coverings prevent scratches during subsequent work.
Thoughtful material choices—porcelain tile, engineered stone, and corrosion-resistant metals—excel in Huntington Beach’s climate.
Phase 9: Cabinetry, Fixtures, and Glass
Vanities and tall storage install plumb and level, followed by tops, sinks, and faucets. Shower systems, toilets, and accessories are set with attention to height, reach, and ergonomics. Glass follows once tile is complete and measured accurately.
Phase 10: Lighting, Paint, and Detailing
Lighting drives function and mood. Vertical lights at mirrors provide even faces, dimmable overheads add ambiance, and accent LEDs bring depth. Paint and silicone lines finish edges and seal transitions for a crisp, clean look.
Phase 11: Commissioning and Clean
Every component is tested: valves, drains, fan performance, outlets, and GFCIs. The team performs a detailed clean, then walks the space with you to create and complete a punch list. Documentation and care guides round out the handoff.
Timelines and Coordination
Project duration depends on scope and lead times. To maintain momentum, make selections early, confirm delivery dates, and keep communication consistent. Weekly updates and a transparent schedule allow quick adjustments if conditions change behind walls.
Coastal Considerations
Salt air demands corrosion-resistant fixtures, robust membranes, and effective ventilation. Window and skylight choices should balance daylight, privacy, and UV control. Slip-resistant flooring and smart storage help manage post-beach routines and moisture.
Quality Checkpoints
Hold the team to verifiable standards at key moments.
- Framing alignment checked before backer boards.
- Flood test results documented before tile.
- Tile flatness and grout consistency verified before sealing.
- Final tests for ventilation, electrical safety, and plumbing function.
These checkpoints provide confidence and reduce rework.
Care After Completion
Protect your investment with simple habits: squeegee glass after showers, use gentle cleaners, and inspect caulk annually. Replace fan filters as needed and verify airflow to control humidity. Maintain a small care kit with recommended cleaners, extra grout, and touch-up paint.
FAQs
Q: How do I minimize disruption while living at home during the remodel?
A: Ask your team to define work hours, dust containment, and daily cleanup. If you have a second bathroom, coordinate shower schedules and plan for brief water shutoffs.
Q: Do I need a permit?
A: Most projects with plumbing or electrical changes require permits. Your contractor can prepare drawings and coordinate inspections.
Q: What materials last in coastal conditions?
A: Porcelain tile, engineered stone or porcelain slabs, and corrosion-resistant metals like brass or stainless perform well. Moisture-resistant cabinetry helps too.
Q: Can small bathrooms feel larger without moving walls?
A: Yes. Curbless showers, wall-mounted vanities, mirrored storage, and bright finishes expand perceived space.
Q: How are timelines affected by custom items?
A: Special orders like glass, custom vanities, or slab fabrication add lead time. Early selection and ordering keep schedules predictable.
Q: What defines a thorough waterproofing job?
A: Continuous membranes, correct slopes, sealed penetrations, and verification by flood test prior to tile installation.
Ready to Start Your Remodel?
If you want a predictable, well-sequenced project that delivers beauty, durability, and comfort in a coastal environment, partner with a team experienced in Huntington Beach homes. From early planning through final detailing, the right experts will guide your bathroom remodeling journey and help you enjoy a smooth, satisfying transformation.